Tutorial for Tree Menu (drop menu)
This is a tutorial on how to create a Tree Menu (or drop menu) in your system
This is a tutorial on how to create a Tree Menu (or drop menu) in your system
Introduction:
With the tree menu you can have up to a three level deep menu system. Meaning inside one tree menu you can have another if so desire. All menus are controlled through the WebEditor. By referencing other sections from a desired page you can create a drop down or tree menu.
This is a flat menu with no attached items.
° Menu Item 1
A menu item with NO tree menu will have a circle besides it to represent this is the end.
This is an example of a tree menu when expanded and closed (2 levels)
°Sub Menu Item 01
°Sub Menu Item 02
See how a menu item with a 1 level deep tree menu has a - to represent it is expanded as far as possible vs the + which means it is closed and can be expanded.
The Three level deep tree menu is a bit more complicated. Here are some examples of what could look like in various states.
This is an example of a tree menu when expanded and closed (3 levels)
+Sub Menu Item 02
Expanded (three levels deep)
+Sub Menu Item 02
°Sub Menu Item 01
°Sub Menu Item 02
°Sub Menu Item 03
By clicking the + and - signs you are able to expand and minimise the three menu.
Login to the Admin Area. Clicking the + next to System then the + Next to Change/Invoice, you can see how the menu can be expanded up to three levels deep.
Tutorial:
From Admin home go to > Configuration > WebEditor
Once here we need to create a new Section, so that by added in a new SectionID (that is not taken), SkinTy (set to = 0), Sort Order, Descr (this is the title of the section) and the AltTag (this is a comment area), then hit Add.
This section will become the items of the drop menu. This tutorial will show you how to create a full three level deep drop menu.
Example: this is an example of creating a new Section.

Add SectionID, this will be a next SectionID that does not exist on the list of sectionID's.
Add SkinTy, Set to 0.
Add Sort Order, same as SectionID.
Add Descr, title for the section.
Add AltTag, Effectively a comment for the section.
Click “Add”
This will then create a new section at the base of the list of sections called, Test Tree Menu (from the above example). Scroll down to the newly created section and select edit from the right side column.
Now you will get taken to a page that looks similar to the prospect section, just with no existing pages. This is where we are going to create the items that appear in the tree menu.
First we will create a few just to get the idea of it. So create a new custom client page. Add all the usual details as you would in WebEditor when creating a new page, ie - set the section, sort order, UserTy, ClientCustomPage(if relevent) and select Add New >>.
Next step is to create a custom client page, if you are confused please refer back to the start of the tutorial. Add or Edit a Custom Page & Adding a New Page.
When adding a custom client page, please make sure that the option accross from Change Menu to: is set to none, as this is the main trigger that will deicide if this particular page has a tree menu from it.
Add a new add a new page, by entering information similar to the below example;
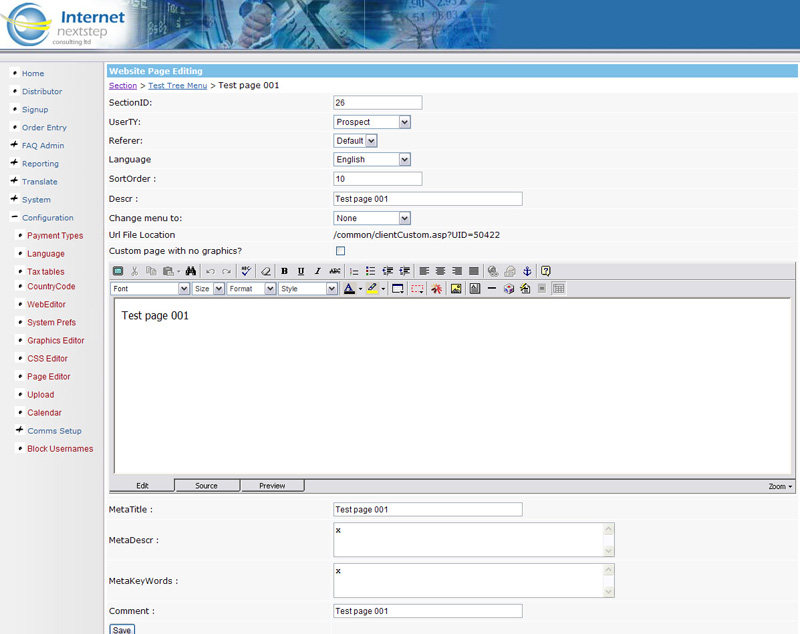
(please click image to enlarge - view full size)
Click Save and then repeat the process a further two times, now you will have three custom client pages that look like the example below when go back to the main area of the section;

- Add or Edit a Custom Page & Adding a New Page
- Edit a Page, Add a Language Version & Add Links From One Page to Another
- Link to a Particular Product in your Cart From Internal Pages & to a Product or Category From
an External Pages
- Link to a Product or Category from a System Page & Make a menu Item go to a category in
the shopping cart
- How to create a Tree Menu (or drop menu) in your system: Page 1
- How to create a Tree Menu (or drop menu) in your system: Page 2
- Add Pictures or Uploaded Items and Link to Them, Change the Style Sheet & Change Internal
Page Graphics

